Halloween Party Decorations: A Five-Step Guide
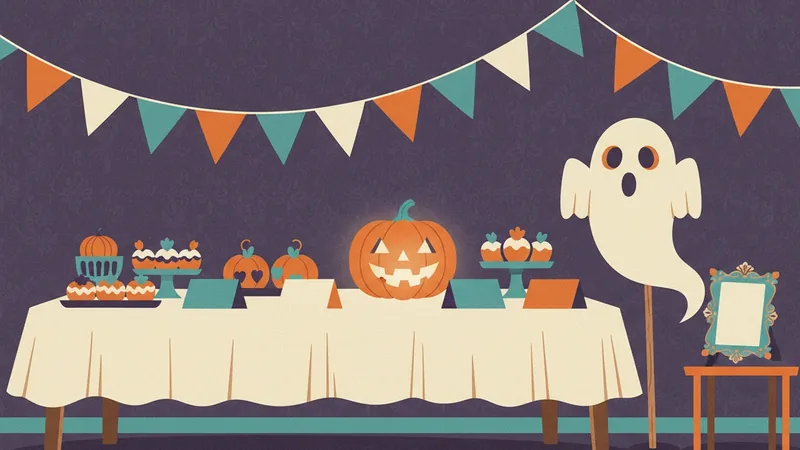
Decorating a party room can turn into a long shopping trip. Halloween party decorations work best when you split the room into five zones (door, welcome wall, food table, games and photo corner) and give each zone one thing to read and one thing to look at.
Most hosts decorate in the order they shop, and the room ends up with one big wall and nothing else. Do it in the order your guests walk instead. They see the door first, then the entry wall, then the food, then the games, and last of all they stop for a photo. Each stop below gets a short list of what to print and how many sheets it takes.
Your Halloween party decorations in five zones
Before you print anything, walk the route a guest takes through your home. Pick the five spots they pass or stop at. Everything you hang should answer a question a guest has at that spot.
| Step | What to do | What to watch for |
|---|---|---|
| Step 1: Door | One welcome sign and a "Please take one" card for the candy bowl | Hang it at child eye level and keep the step clear |
| Step 2: Welcome wall | A banner over the main wall | The banner is the biggest print job, 14 sheets |
| Step 3: Food table | Tent cards with a food name and an allergy line | Write the allergy line before guests arrive |
| Step 4: Games | Station signs so kids know where to go | Two or three signs are plenty |
| Step 5: Photo corner | A frame, props on sticks and a poster behind | An adult cuts out the props |
A room feels decorated when every spot a guest looks at has something to read.
Step 1: Set the door first, and keep the step clear
Your door tells guests the party is real. Put one big sign there and keep the rest of the porch simple. Tape a "Welcome, Little Monsters" sign at child eye level with painter's tape. If the door is outdoors, slide the sheet into a clear sheet protector with the opening at the bottom, so rain runs off.
The second print for this zone is a "Please take one" card for the candy bowl. It saves you from answering the same question all night. Two sheets cover the door.
The U.S. Consumer Product Safety Commission gives two tips that matter at a front door. It says to use battery-operated lights and glow sticks instead of candles, and to remove obstacles from lawns, steps and porches when you expect trick-or-treaters. A paper sign next to a real flame is a bad pair, so keep any candle well away from your decorations.
Step 2: Hang a banner on the welcome wall
The entry wall is where guests look after they walk in. A pennant banner fills it fast. Each pennant for HAPPY HALLOWEEN is one printed sheet, and the phrase has 14 letters, so you print 14 sheets. Each pennant is 6.6 inches wide, which makes a line of about 92 inches if the pennants touch. In practice you hang it in two rows, HAPPY (5 pennants, about 33 inches) over HALLOWEEN (9 pennants, about 59 inches).
The banner is the biggest job in the whole room, so print it first and cut while you watch something. Punch two holes per pennant, thread string through and tape the string ends to the wall. A "Come on in! It's a Halloween party" sign with the date written on it goes beside the banner. In this zone you print 15 sheets.
The banner, the welcome sign, the station signs, the posters, the door signs and the photo props all sit in one set. You can get all six as the Signs & Decor Bundle so the colors match from the door to the photo corner.
Free printable Halloween decorations are fine for one zone, and a single free banner can be a good start. The catch comes when you need five zones to match. Free sheets from different sites rarely share colors, so the room can look pieced together.
Step 3: Label the food table so guests can read it
A food table full of plain cups and bowls can be more fun with names on it. Fold a tent card for each dish. Names like Witch's Brew, Mummy Dogs, Monster Munch, Bat Wings and Graveyard Dirt Cups turn a bowl of snacks into part of the room. One printed page holds eight tent cards, and a table with six or seven dishes needs one page.
Each Halloween Food Labels card has an allergy line. Fill it in before the party, and check with the families when you invite them. Hang three BOO pennants above the table and you have used four sheets here: one page of cards and three pennants.
Cards that fold into tents read from both sides of the table. That helps when the food table sits in the middle of the room, as it often does at a kids' party.
Step 4: Point to the games with station signs
At a kids' party, children stand in the middle of the room and ask where things are. A tent sign solves that. Choose two or three stations and print one sheet for each. Games, Coloring and Quiet Corner are a good set for a living room, because they give the busy kids, the artistic kids and the tired kids each a spot.
Fold the sheet into a tent card for a table. The fold line also works as a cut line, so you can cut the page in half for two flat wall signs instead. Three sheets cover this zone.
A sign is also the cheapest way to separate a loud corner from a quiet one. Put Games near the door, where noise bothers nobody, and keep Quiet Corner on the far side of the room.
Step 5: Build a photo corner with props and a poster
Kids stay at a photo corner for a long time, so it is worth the most effort. Hang one or two vintage posters behind it as a backdrop. Each poster is one sheet, so two posters cost two sheets. Print them on card stock or matte photo paper, and take the file to a copy shop if you want an 11 by 17 inch poster.
Then add the photo booth props. There are 24 props, from a witch hat and a pumpkin head to fangs, glasses and speech bubbles like "BOO!" and "Got Candy?". The props take 7 pages, and the "Smile, it's Happy Halloween 2026" frame takes one more. An adult cuts out each prop and the frame, and you tape a stick to the back of each prop. Eight sheets for the props and frame, plus two for the posters, make 10 sheets for the corner.
Cheap homemade extras and fixes for a sparse room
Paper and jars can fill the gaps between zones. Drape a white sheet over a chair for a ghost. Cut bats from black construction paper and tape them in a flock up a wall. Put a battery-operated tea light in a clean jar, which follows the CPSC advice about flameless lights. Skip anything with a real flame.
If the room looks sparse when guests are about to arrive, group things instead of spreading them. Hang a second row of pennants, move the posters beside the photo corner and put a battery light next to every food card. Three things close together look fuller than six things spread out. A bare wall is the first place guests notice.
What the whole plan costs in sheets and dollars
All five zones add up to 34 printed sheets: 2 for the door, 15 for the welcome wall, 4 for the food table, 3 for games and 10 for the photo corner. One afternoon of printing fills a whole room.
| Zone | What to print | Sheets |
|---|---|---|
| Door | Welcome sign, "Please take one" card | 2 |
| Welcome wall | HAPPY HALLOWEEN banner, "Come on in" sign | 15 |
| Food table | One page of food cards, three BOO pennants | 4 |
| Games | Games, Coloring and Quiet Corner station signs | 3 |
| Photo corner | Frame, 7 pages of props, two posters | 10 |
| Total | 34 |
For files, the six signs and decor PDFs sell for $29.94 separately and $14.99 as the Signs & Decor Bundle. Halloween Food Labels are $3 on their own, so the whole plan comes to $17.99 in files. Paper and ink are on top. The banner uses the most ink, because the orange and purple pennants are solid color. Every file is a PDF with US Letter and A4 pages. It comes by email after checkout, so you can print the same day, at actual size and as often as you need for your own party.
The National Retail Federation's 2026 survey found that 78 percent of Halloween shoppers plan to buy decorations, with $4.3 billion expected to go on them. The same survey puts the average spend per person at $115.14 across all of Halloween. Decorating from the files above costs $17.99 plus paper and ink, which leaves more of your own budget for candy.
You do not need any other app. The files open in any PDF reader. The name lines on the welcome sign, the blank station cards and the food labels have type-in fields you fill in a free PDF reader, and everything else you print and write on by hand.
Free printables are enough when you only want one sign or one banner. What the paid files add is a matching set in one design, both paper sizes, type-in fields where they help and nothing to redraw.
Printables cover signs and walls. They do not give you a fog machine, a light-up pumpkin or a three-dimensional prop. For a haunted-house feeling with big props, buy those and use the printed signs to tell guests where to go. Without a printer at home, the plan is the wrong fit unless you can print at a library or copy shop.
The Signs & Decor Bundle has the signs for all five zones in one download.
FAQ
What are some good decorations for a Halloween party?
Pick one per zone. A sign for the door, a banner on the main wall, tent cards on the food table, station signs for games and a photo corner with props. Add battery-operated lights if you want a glow.
How to cheaply decorate for a Halloween party?
Print your signs and reuse what you own. A 34-sheet plan for five zones costs $17.99 in files (the $14.99 Signs & Decor Bundle plus $3 Halloween Food Labels), plus your own paper and ink.
How to make a Halloween party more fun?
Give guests something to do in every zone. A photo corner with props, a station sign that says where the games are and food labels with names like Mummy Dogs all invite kids to join in.
What are some easy Halloween decorating ideas?
Hang a pennant banner, tape a welcome sign to the door at child eye level, fold tent cards for the food table and set out a photo frame with a few props on sticks.
Conclusion
Start at the door and work inward, the way your guests will walk. Five zones, 34 printed sheets and a few rolls of tape are enough to make a living room look planned. Add real lights and pumpkins where you like. Keep the signs doing the talking, so every guest knows where to go and what to do.
Sources
- U.S. Consumer Product Safety Commission, CPSC Offers Safety Tips to Keep Hazards from Haunting Your Halloween (2022). Last checked October 7, 2026.
- National Retail Federation, NRF Halloween Survey Shows Consumer Spending Expected to Reach $13.5 Billion (2026). Last checked October 7, 2026.