Pumpkin Stencils: Transfer and Carve Cleanly
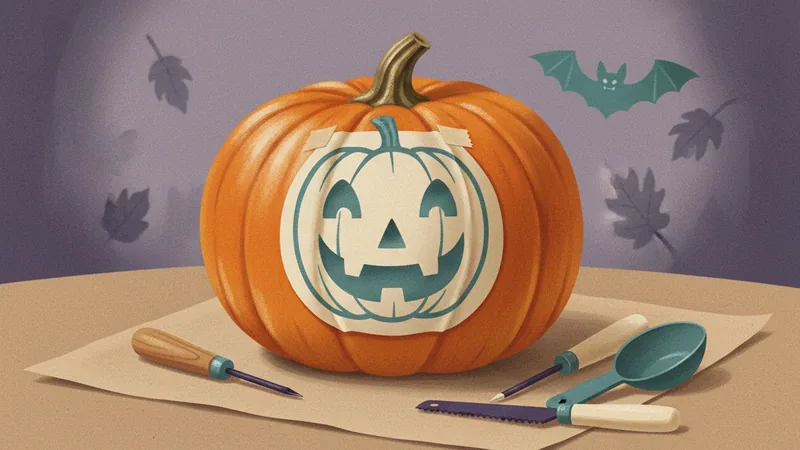
A flat page and a round pumpkin do not agree until you tape them down right. Pumpkin stencils go from paper to carving in five steps. You trim and tape, transfer the lines, cut small parts first, push pieces out and light it.
A stencil is only a drawing until it is on the pumpkin. The steps below take it from a flat page to a clean cut. They also compare the three ways to move the lines across. These are pin-poke, tape and trace, and graphite.
| Step | What to do | What to watch for |
|---|---|---|
| 1. Prep | Clean out, dry the surface, trim the paper | Wet rind makes tape slip |
| 2. Transfer | Pin-poke, tape and trace, or graphite | Pick one method for your first design |
| 3. Cut | Small shapes first, outer edge last | Thin bridges snap when cut early |
| 4. Finish | Push pieces out, clean edges | Pieces pushed from the inside break less |
| 5. Light | Battery light or glow stick | An open flame is a fire risk |
Step 1: Clean out the pumpkin and trim the stencil
Scoop out the pumpkin first and scrape the wall behind your design to about an inch thick. Dry the outside with a towel, because tape will not hold on a wet rind. A pumpkin with a smooth, wide face works best, since a stencil lies flatter on it. Consumer Reports suggests choosing the design before you pick the pumpkin, and smooth-faced ones without deep ridges for young carvers.
Next, cut the stencil out along its trim line, leaving a margin of paper. A flat page cannot wrap around a round pumpkin without wrinkling, so cut a few short slits from the edge toward the design. Overlap the slit edges when you tape, and the paper will hug the curve.
A stencil is a map, not the carving.
Step 2: Transfer the design with pin-poke, tape and trace, or graphite
There are three ways to get the lines onto the pumpkin. Each trades speed against cleanliness, so the table below puts them side by side.
| Method | How it works | Speed | Best for | Weak spot |
|---|---|---|---|---|
| Pin-poke | Tape the stencil on, poke holes along the lines with a pin tool or toothpick, peel the paper off | Medium | Detailed and thin designs | Dots are hard to see on a dark or wet rind |
| Tape and trace | Tape the stencil on and carve straight through the paper, or trace the lines with a marker | Fast | Big, simple shapes | Paper wrinkles and the marker smudges on a wet rind |
| Graphite | Rub pencil lead on the back of the stencil, tape it graphite side down, and trace the lines | Slow | Fine lines you want to keep | Needs a dry rind, and the lines fade when wiped |
Consumer Reports lists several of these methods. You can tape the stencil directly to the pumpkin and carve through it, use a poking roller to mark dotted lines, or use transfer paper and trace around the pattern. Our own view is that pin-poke is the best first choice. The dots stay on the pumpkin after the paper is gone, and you can see exactly where each cut goes.
For pin-poke, space the holes about 1/8 inch apart along the lines and press them through the paper into the rind. They do not need to go through the pumpkin wall. After you peel off the paper, rub a little flour into the holes, so the dots show up on the orange.
Step 3: Cut the small shapes first, the outer edge last
The order of the cuts decides whether the thin parts survive. Start with the smallest cut-outs inside the design. These are eyes, teeth and small islands. Cut the long outside edges last. A long thin strip of rind that already has its neighbors cut away will snap under a saw.
Use a small serrated saw, not a kitchen knife, and saw in short strokes, turning the pumpkin and not the blade. Consumer Reports recommends a saw over a knife, and advises to start with the hardest parts of the design first. It also says once you cut a section out, you should not remove it right away, so the pumpkin stays whole while you work.
Leave every cut-out piece in place until the very last cut. Then push the pieces out from the back, and the thin parts that held them stay intact. The CPSC says to leave pumpkin carving to the adults, and child helpers can scoop the inside or trace the design with a marker.
Step 4: Push the pieces out and fix the edges
Push each piece out with your thumb from the inside of the pumpkin. If a thin bridge snaps, push it back with a toothpick, or trim the edge so the break looks planned.
Seal the cuts with Vaseline or vegetable oil, which NC State Extension says helps prevent moisture loss. NC State also says that a carved pumpkin should last between 8 and 11 days, so carve it two to four days before you need it. Do not carve it weeks ahead.
Step 5: Light it with a battery light
Use a battery light or a glow stick. The CPSC says to use battery-operated lights or glow sticks rather than an open-flame candle. Candles also create heat, which NC State says shortens a pumpkin's shelf life.
Place the light inside and turn off the room lights. The thin parts glow brighter than the thick ones, so take a look and shave any spot that is too dark.
Pumpkin stencils that make the five steps easier
You can print any stencil and follow the five steps above. Pumpkin Carving Stencils prints a dashed trim line and four tape marks on every stencil, so Step 1 is already marked. It has eight designs, about 6.5 inches wide. Four are easy (Classic Grin, Surprised Face, Wise Owl, Bat and Stars) and four are medium (Boo Ghost, Cat and Moon, Spider Web, Witch Across the Moon). Page 2 is a six-step how-to.
Pumpkin Carving Stencils is the wrong choice when you want a design wider than 6.5 inches. It is also wrong for a hard pattern or a stencil of a specific character. The set covers easy and medium designs only. Free printable stencils exist, and a single free one is often enough for a one-time carving. What the paid set adds is eight designs in one style and both paper sizes (US Letter and A4). The trim line and tape marks are already printed, and there is nothing to redraw or resize. No other app is needed. The PDF opens in any PDF reader. You print and cut the stencils by hand, with no fields to fill in. It comes by email after checkout, so you can print it the same day.
For a design of your own, draw bold shapes on paper, add a bridge to every island, and use the same five steps.
FAQ
What size pumpkin is best for carving?
Pick one with a smooth, wide face a little bigger than your stencil. Consumer Reports says young carvers should choose smooth-faced pumpkins without deep ridges, which are lighter and have thinner rinds. A 6.5-inch-wide stencil fits comfortably on a medium pumpkin.
How to carve a Jack O'lantern pumpkin?
Clean it out, tape on the stencil, transfer the lines, cut the small shapes first, then the large ones, and push the pieces out. An adult handles the knife. Light it with a battery light or a glow stick.
How to make your own pumpkin carving stencils?
Draw a bold shape on paper, thick lines only, with a bridge inside every island. Trace it onto the pumpkin with a marker or transfer it with pin pokes. Keep the first design simple: a few big shapes carve cleaner than many small ones.
Are dremels good for carving pumpkins?
A rotary tool can cut fine detail, but it is a power tool and an adult's job. Consumer Reports mentions a drill attachment for cleaning out the inside, and says to use a saw rather than a knife for carving.
What do professionals use to carve pumpkins?
Small serrated saws and poking tools, per Consumer Reports, which advises a saw rather than a knife. A drill attachment can also gut the pumpkin quickly.
How do I carve a ghost in a pumpkin?
Tape a ghost stencil on a tall pumpkin, poke the outline, then cut the eyes and mouth first and the outer edge last. Keep every cut-out piece in place until all the cuts are done.
Conclusion
A good stencil carving comes from the prep, not the knife. Trim the paper with slits so it lies flat. Use the pin-poke method for your first one. Cut the inside shapes before the outside edges. Push pieces out gently, light the pumpkin with a battery light and let an adult hold the saw.
Sources
- Consumer Reports, How to Carve a Pumpkin Like a Pro (undated). Last checked October 7, 2026.
- Consumer Product Safety Commission, CPSC Offers Safety Tips to Keep Hazards from Haunting Your Halloween (2023). Last checked October 7, 2026.
- NC State Extension, How to Pick and Keep the Perfect Pumpkin (2023). Last checked October 7, 2026.