Pumpkin Carving Ideas: Eight Designs by Skill
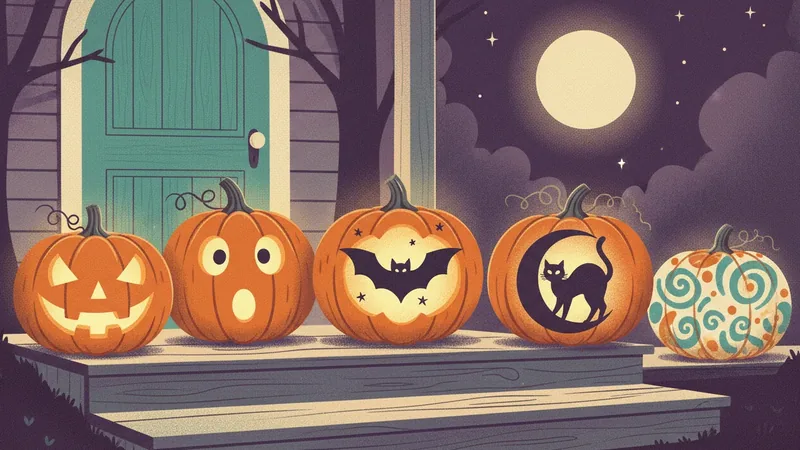
Standing over a pumpkin with no plan is how most bad jack-o'-lanterns start. The best pumpkin carving ideas match your skill. A painted face needs no knife, a grin needs a small saw, and a cat on the moon needs a stencil and a steady hand.
Not every pumpkin needs a knife. The eight designs below run from no cutting at all to a thin-bridge scene that can snap. Each one lists the tool it needs, about how many minutes it takes and how long it will last on the porch.
1. A painted or marker face, no cutting
A painted face suits a four-year-old, a rainy afternoon and anyone who wants a pumpkin that is still good on Monday. Draw a face with paint pens or a marker, or cover the pumpkin in stripes, dots or a simple cat.
You need a marker or a paint pen and about 15 minutes for one pumpkin. NC State Extension says that a pumpkin painted or decorated with markers will last much longer than a carved one. That is why this design suits a pumpkin you set out early. This is also the cute option: a round smile and two big eyes read as friendly from the street.
2. A dotted pattern made with a poking tool
Poke a pattern of small holes into the rind with a pin tool, a screw or a nail. The light shines through as stars, a moon or a ghost. Nothing is cut out, so nothing falls in.
Grab a pin tool or a large nail and allow 20 to 40 minutes, depending on how many dots. This is a good one for a child who wants to help, since there is no blade. A pumpkin with only small holes loses less rind than a cut one. It should hold up longer than a full carving, but we have no figure for how much longer.
3. The classic grin, an easy first carving
Two triangle eyes, a triangle nose and a toothy mouth are the oldest pumpkin carving ideas for a reason. Every cut is a big shape, and nothing thin can break. It is the best first carving for an older child with an adult beside them, or for an adult who has never done one.
A small serrated carving saw does the job in about 30 minutes after the pumpkin is cleaned out. Leave one or two teeth in the mouth as thick as your thumb, and the grin will stay put. A carved pumpkin should last between 8 and 11 days, per NC State Extension. Carve this one two to four days before the party.
4. A surprised or silly face, easy and funny
Make the eyes uneven, put a big round mouth in the middle and add one tooth. A surprised face, a goofy sneeze or a face with a tongue sticking out gets laughs. It is as easy to cut as the classic grin, because the shapes are round and wide.
The same small saw works, and 30 to 40 minutes is enough. Round holes are easy to saw if you cut in short strokes and turn the pumpkin, rather than the blade. For a funny pumpkin, change the face a little each year, and you will never repeat one.
5. A bat and stars silhouette, easy to medium
A bat with spread wings, with a few star-shaped holes around it, is a cool design that looks like much more than it is. The wings are wide and the star points are short, so the work is tidier than it looks.
Use a small saw for the bat and a poking tool or a drill bit for the stars, and allow 45 to 60 minutes. Cut the wing edges last, since the tips are the thinnest part. For a carver who has never cut a pattern, this is a good second pumpkin after the grin.
6. A cat on the moon, medium and spooky
A black cat on a round moon is a scary-pumpkin classic that is not too scary for small guests. The cat is a solid shape. You cut away the moon and leave the cat as a dark shape in front of the light.
Use a small saw plus a poking tool for the outline, and allow 60 to 90 minutes. The cat's whiskers and ears are the thin parts, so cut them last and keep the cut-out pieces in place until you are done. Consumer Reports advises that once you cut a section out, you should not remove it right away, so the pumpkin stays whole while you work. Keep the pieces in until the end.
7. A ghost with BOO letters, medium
A tall ghost shape with round eyes works well on a tall pumpkin. Carve the ghost as the cut-away part, and the light fills it in. Letters are harder, because the middle of an O or B is an island that falls out unless you keep a bridge.
Cutting takes a steady hand and a small saw, so allow 60 to 90 minutes. Draw the letters with a marker first, and add a bridge to every island. If an island will not hold a bridge, skip that letter and keep the ghost face.
8. A spider web or a witch across the moon, medium to hard
A web of thin spokes and rings is the design most likely to break, because the thin strips of rind carry the whole design. A witch flying across the moon has the same trouble in the broom and the hat tip. Both look very good when they work, and a broken strip can be pushed back in with a toothpick.
You need a small saw, a poking tool and patience, and should allow 90 minutes or more. Choose a pumpkin with a smooth, wide face, cut the inside shapes first and the outer edge last. Do not try a web as a first carving.
How to choose pumpkin carving ideas by skill, tool and time
Choose by what you have in your hand. No tool but a marker means idea 1. A pin tool means idea 2. A small serrated saw opens ideas 3 to 5, and a saw plus a poking tool opens 6 to 8. A kitchen knife is the wrong tool for any of them. The minutes below are our own estimates for one adult carver after the pumpkin is cleaned out, so add time if a child helps.
| Idea | Skill | Tool | Minutes | Lasts |
|---|---|---|---|---|
| 1. Painted or marker face | Any age | Marker or paint pen | 15 | Longest, no cuts |
| 2. Dotted pattern | Any age with help | Pin tool or nail | 20 to 40 | Longer than a cut design |
| 3. Classic grin | Easy | Small serrated saw | 30 | 8 to 11 days |
| 4. Surprised or silly face | Easy | Small serrated saw | 30 to 40 | 8 to 11 days |
| 5. Bat and stars | Easy to medium | Saw and poking tool | 45 to 60 | 8 to 11 days |
| 6. Cat on the moon | Medium | Saw and poking tool | 60 to 90 | 8 to 11 days |
| 7. Ghost with letters | Medium | Small saw | 60 to 90 | 8 to 11 days |
| 8. Spider web or witch | Medium to hard | Saw and poking tool | 90 or more | 8 to 11 days, thin parts dry first |
The cutting designs last about as long as each other. To get a longer-lasting pumpkin, pick idea 1 or 2, or carve later. For all of them, NC State Extension says to seal the cuts with Vaseline or vegetable oil. It also says to use a glow stick or an electric candle, since candles create heat that shortens shelf life.
A good jack-o'-lantern is one the carver can finish.
If you want the designs from entries 3 to 8 without drawing them yourself, Pumpkin Carving Stencils has eight easy and medium designs. They include a Classic Grin, Surprised Face, Bat and Stars, Cat and Moon, Boo Ghost, Spider Web and Witch Across the Moon. Each stencil is one page, about 6.5 inches wide. It is the wrong choice when you want a freehand face, a design that fills a very large pumpkin, or a hard design. The set only covers easy and medium, so there is no hard pattern in it. For those, draw your own with a marker, or pick idea 1 or 2.
A short tool list covers all eight ideas: a scoop, a marker, a pin tool or large nail, and a small serrated saw. Skip the kitchen knife. You do not need kid-safe carving tools for ideas 1 and 2, since a marker and a pin tool have no blade. For ideas 3 to 8 the saw stays with an adult, so a child-sized saw adds little.
Free printable designs exist, and they can be enough if you only want one and do not mind sizing it yourself. What the paid set adds is eight designs in one style and both paper sizes (US Letter and A4). Every page has a trim line and four tape marks, and there is nothing to redraw. There is no other app to learn: it is a PDF that opens in any PDF reader. The PDF comes by email after checkout, so you can print it the same day. Print at actual size, as often as you need for your own family or party.
Adults handle the knife. The CPSC says to leave pumpkin carving to the adults, and child helpers can scoop the inside or trace the design with a marker.
FAQ
What are some easy pumpkin carving ideas?
A painted or marker face needs no cutting at all. A simple grin or a surprised face with a few big shapes is the easiest design to cut, and a small serrated saw handles it in about 30 minutes. Skip thin lines and small islands until you have carved one.
What are some scary pumpkin carving ideas?
Use a wide jagged mouth, slanted eyes and a bat or spider web. A witch across the moon or a cat with an arched back looks scary once the light is on. These are medium designs, so plan 60 to 90 minutes.
Do you cut the top or bottom of a pumpkin when carving?
Either works. NC State Extension suggests a hole in the rear of the pumpkin instead of the top, and Consumer Reports suggests carving out the base instead of removing the stem. Both make it easy to place a light, and you keep the stem for looks.
How many days before Halloween should you carve a pumpkin?
Carve it two to four days before. NC State Extension says a carved pumpkin should last between 8 and 11 days, and warns against carving too soon. A warm porch can shorten that, so carve closer to the night if it is hot.
What does putting vaseline on a carved pumpkin do?
It seals the cut edges so the pumpkin loses less moisture. NC State Extension suggests sealing the cuts with Vaseline or vegetable oil to slow shriveling.
What did people use to carve instead of pumpkins?
Turnips. Smithsonian Magazine says that in the 19th and early 20th centuries, carving ghoulish grins into turnips was the more common practice, at least in Ireland and other Celtic nations.
Conclusion
Pick the design by your skill and your tool, not by the photo you saw. A first-time carver should start with a painted face or a simple grin. Carve within a few days of the party and light it with a battery light. Save the thin-bridge designs for the year after you practice on an easy one.
Sources
- NC State Extension, How to Pick and Keep the Perfect Pumpkin (2023). Last checked October 7, 2026.
- Consumer Product Safety Commission, CPSC Offers Safety Tips to Keep Hazards from Haunting Your Halloween (2023). Last checked October 7, 2026.
- Smithsonian Magazine, When People Carved Turnips Instead of Pumpkins for Halloween (2021). Last checked October 7, 2026.
- Consumer Reports, How to Carve a Pumpkin Like a Pro (undated). Last checked October 7, 2026.